


You are looking at the documentation of a prior release. To read the documentation of the latest release, please
visit here.
Using KubeStash with TLS secured Minio Server
Minio is an open-source object storage server compatible with AWS S3 cloud storage service. This guide will show you how to use KubeStash to backup and restore volumes of a Kubernetes workload in Minio backend. Here, we are going to backup a volume of a Deployment into a Minio bucket. Then, we are going to show how to restore this backed up data into a volume of another Deployment.
Before You Begin
At first, you need to have a Kubernetes cluster. If you don’t already have a cluster, you can create one by using kind.
Install
KubeStashin your cluster following the steps here.You should be familiar with the following
KubeStashconcepts:You will need a TLS secured Minio server to store backed up data. If you already do not have a Minio server running, deploy one following the tutorial from here. For this tutorial, we have deployed Minio server in
storagenamespace and it is accessible throughminio.storage.svcdns.
To keep everything isolated, we are going to use a separate namespace called demo throughout this tutorial.
$ kubectl create ns demo
namespace/demo created
Choosing StorageClass:
KubeStash works with any StorageClass. Check available StorageClass in your cluster using the following command:
$ kubectl get storageclass -n demo
NAME                 PROVISIONER                AGE
standard (default)   k8s.io/minikube-hostpath   130m
Here, we have standard StorageClass in our cluster.
Note: YAML files used in this tutorial are stored in docs/guides/platforms/minio/examples directory of kubestash/docs repository.
Backup the Volumes of a Deployment
Here, we are going to deploy a Deployment with a PVC. This Deployment will automatically generate some sample data into the PVC. Then, we are going to backup this sample data using KubeStash.
Prepare Workload
At first, let’s deploy the workload whose volumes we are going to backup. Here, we are going create a PVC and deploy a Deployment with this PVC.
Create PVC:
Below is the YAML of the sample PVC that we are going to create,
kind: PersistentVolumeClaim
apiVersion: v1
metadata:
  name: source-pvc
  namespace: demo
spec:
  accessModes:
  - ReadWriteOnce
  storageClassName: standard
  resources:
    requests:
      storage: 1Gi
Let’s create the PVC we have shown above,
$ kubectl apply -f https://github.com/kubestash/docs/raw/v2024.8.30/docs/guides/platforms/minio/examples/pvc.yaml
persistentvolumeclaim/source-pvc created
Deploy Deployment:
Now, we are going to deploy a Deployment that uses the above PVC. This Deployment will automatically generate sample data (data.txt file) in /source/data directory where we have mounted the PVC.
Below is the YAML of the Deployment that we are going to create,
apiVersion: apps/v1
kind: Deployment
metadata:
  labels:
    app: kubestash-demo
  name: kubestash-demo
  namespace: demo
spec:
  replicas: 3
  selector:
    matchLabels:
      app: kubestash-demo
  template:
    metadata:
      labels:
        app: kubestash-demo
      name: busybox
    spec:
      containers:
        - args: ["echo sample_data > /source/data/data.txt && sleep 3000"]
          command: ["/bin/sh", "-c"]
          image: busybox
          imagePullPolicy: IfNotPresent
          name: busybox
          volumeMounts:
            - mountPath: /source/data
              name: source-data
      restartPolicy: Always
      volumes:
        - name: source-data
          persistentVolumeClaim:
            claimName: source-pvc
Let’s create the Deployment we have shown above.
$ kubectl apply -f https://github.com/kubestash/docs/raw/v2024.8.30/docs/guides/platforms/minio/examples/deployment.yaml
deployment.apps/kubestash-demo created
Now, wait for the pods of the Deployment to go into the Running state.
$ kubectl get pod -n demo
NAME                              READY   STATUS    RESTARTS   AGE
kubestash-demo-69f9ffbbf7-6wwtr   1/1     Running   0          60s
kubestash-demo-69f9ffbbf7-88kgj   1/1     Running   0          60s
kubestash-demo-69f9ffbbf7-q8qld   1/1     Running   0          60s
To verify that the sample data has been created in /source/data directory, use the following command:
$ kubectl exec -n demo kubestash-demo-69f9ffbbf7-6wwtr -- cat /source/data/data.txt
sample_data
Prepare Backend
We are going to store our backed up data into an Minio Bucket. At first, we need to create a secret with the access credentials to our Minio bucket. Then, we have to create a Repository crd that will hold the information about our backend storage. If you want to use a different backend, please read the respective backend configuration doc from here.
Create Secret:
Let’s create a secret called minio-secret with access credentials to our desired Minio bucket,
$ echo -n '<your-minio-access-key-id-here>' > AWS_ACCESS_KEY_ID
$ echo -n '<your-minio-secret-access-key-here>' > AWS_SECRET_ACCESS_KEY
$ cat ./directory/of/root/certificate/ca.crt > CA_CERT_DATA
$ kubectl create secret generic -n demo minio-secret \
    --from-file=./AWS_ACCESS_KEY_ID \
    --from-file=./AWS_SECRET_ACCESS_KEY \
    --from-file=./CA_CERT_DATA
secret/minio-secret created
Verify that the secret has been created successfully,
$ kubectl get secret -n demo minio-secret -o yaml
apiVersion: v1
data:
  AWS_ACCESS_KEY_ID: YWRtaW4=
  AWS_SECRET_ACCESS_KEY: Y2hhbmdlaXQ=
  CA_CERT_DATA: dXNlIHlvdXIgb3duIGNyZWRlbnRpYWxz # <base64 endoded ca.crt data>
kind: Secret
metadata:
  creationTimestamp: "2024-02-23T05:32:40Z"
  name: minio-secret
  namespace: demo
  resourceVersion: "7824"
  selfLink: /api/v1/namespaces/demo/secrets/minio-secret
  uid: 31c9310d-dc31-42a3-bc42-f9318290b091
type: Opaque
Create BackupStorage:
Now, create a BackupStorage using this secret. Below is the YAML of BackupStorage crd we are going to create,
apiVersion: storage.kubestash.com/v1alpha1
kind: BackupStorage
metadata:
  name: minio-storage
  namespace: demo
spec:
  storage:
    provider: s3
    s3:
      secretName: minio-secret
      endpoint: http://minio.storage.svc.cluster.local:443
      bucket: minio-bucket
      region: us-east-1
      prefix: /demo
  usagePolicy:
    allowedNamespaces:
      from: All
  default: true
  deletionPolicy: WipeOut
Here,
- If you didn’t set
CA_CERT_DATAintominio-secretsecret file then you might want to skip TLS verification. In that case, within theBackupStorageconfiguration under theS3section, ensure theinsecureTLSfield is set totrue.
Let’s create the BackupStorage we have shown above,
$ kubectl apply -f https://github.com/kubestash/docs/raw/v2024.8.30/docs/guides/platforms/minio/examples/backupstorage.yaml
backupstorage.storage.kubestash.com/minio-storage created
Now, we are ready to backup our sample data into this backend.
Create RetentionPolicy:
Now, let’s create a RetentionPolicy to specify how the old Snapshots should be cleaned up.
Below is the YAML of the RetentionPolicy object that we are going to create,
apiVersion: storage.kubestash.com/v1alpha1
kind: RetentionPolicy
metadata:
  name: demo-retention
  namespace: demo
spec:
  default: true
  failedSnapshots:
    last: 2
  maxRetentionPeriod: 2mo
  successfulSnapshots:
    last: 5
  usagePolicy:
    allowedNamespaces:
      from: All
Notice the spec.usagePolicy that allows referencing the RetentionPolicy from all namespaces. To allow specific namespaces, we can configure it accordingly by following RetentionPolicy usage policy.
Let’s create the above RetentionPolicy,
$ kubectl apply -f https://github.com/kubestash/docs/raw/v2024.8.30/docs/guides/platforms/minio/examples/retentionpolicy.yaml
retentionpolicy.storage.kubestash.com/demo-retention created
Backup
We have to create a BackupConfiguration crd targeting the kubestash-demo Deployment that we have deployed earlier. Then, KubeStash will create a CronJob for each session to take periodic backup of /source/data directory of the target.
At first, we need to create a secret with a Restic password for backup data encryption.
Create Secret:
Let’s create a secret called encry-secret with the Restic password,
$ echo -n 'changeit' > RESTIC_PASSWORD
$ kubectl create secret generic -n demo encryption-secret \
    --from-file=./RESTIC_PASSWORD \
secret "encryption-secret" created
Create BackupConfiguration:
Below is the YAML of the BackupConfiguration crd that we are going to create,
apiVersion: core.kubestash.com/v1alpha1
kind: BackupConfiguration
metadata:
  name: sample-backup-dep
  namespace: demo
spec:
  target:
    apiGroup: apps
    kind: Deployment
    name: kubestash-demo
    namespace: demo
  backends:
    - name: minio-backend
      storageRef:
        name: minio-storage
        namespace: demo
      retentionPolicy:
        name: demo-retention
        namespace: demo
  sessions:
    - name: demo-session
      scheduler:
        schedule: "*/5 * * * *"
        jobTemplate:
          backoffLimit: 1
      repositories:
        - name: minio-demo-repo
          backend: minio-backend
          directory: /dep
          encryptionSecret:
            name: encryption-secret
            namespace: demo
      addon:
        name: workload-addon
        tasks:
          - name: logical-backup
            targetVolumes:
              volumeMounts:
                - name: source-data
                  mountPath: /source/data
            params:
              paths: /source/data
              exclude: /source/data/lost+found
      retryConfig:
        maxRetry: 2
        delay: 1m
Let’s create the BackupConfiguration crd we have shown above,
$ kubectl apply -f https://github.com/kubestash/docs/raw/v2024.8.30/docs/guides/platforms/minio/examples/backupconfiguration.yaml
backupconfiguration.core.kubestash.com/sample-backup-dep created
Verify Backup Setup Successful
If everything goes well, the phase of the BackupConfiguration should be Ready. The Ready phase indicates that the backup setup is successful. Let’s verify the Phase of the BackupConfiguration,
$ kubectl get backupconfiguration -n demo
NAME                PHASE   PAUSED   AGE
sample-backup-dep   Ready            2m50s
Verify CronJob:
It will also create a CronJob with the schedule specified in spec.sessions[*].scheduler.schedule field of BackupConfiguration crd.
Verify that the CronJob has been created using the following command,
$ kubectl get cronjob -n demo
NAME                                     SCHEDULE      SUSPEND   ACTIVE   LAST SCHEDULE   AGE
trigger-sample-backup-dep-demo-session   */5 * * * *             0        2m45s           3m25s
Wait for BackupSession:
Wait for the next schedule for backup. Run the following command to watch BackupSession crd,
$ kubectl get backupsession -n demo -w

NAME                                        INVOKER-TYPE          INVOKER-NAME        PHASE       DURATION   AGE
sample-backup-dep-demo-session-1706015400   BackupConfiguration   sample-backup-dep   Succeeded              7m22s
We can see from the above output that the backup session has succeeded. Now, we are going to verify whether the backed up data has been stored in the backend.
Verify Backup:
Once a backup is complete, KubeStash will update the respective Repository crd to reflect the backup. Check that the repository mino-demo-repo has been updated by the following command,
$ kubectl get repository -n demo minio-demo-repo
NAME                INTEGRITY   SNAPSHOT-COUNT   SIZE    PHASE   LAST-SUCCESSFUL-BACKUP   AGE
minio-demo-repo     true        1                806 B   Ready   8m27s                    9m18s
At this moment we have one Snapshot. Run the following command to check the respective Snapshot which represents the state of a backup run to a particular Repository.
$ kubectl get snapshots -n demo -l=kubestash.com/repo-name=minio-demo-repo
NAME                                                        REPOSITORY       SESSION        SNAPSHOT-TIME          DELETION-POLICY   PHASE       AGE
minio-demo-repo-sample-backup-dep-demo-session-1706015400   mino-demo-repo   demo-session   2024-01-23T13:10:54Z   Delete            Succeeded   16h
Note: KubeStash creates a
Snapshotwith the following labels:
kubestash.com/app-ref-kind: <target-kind>kubestash.com/app-ref-name: <target-name>kubestash.com/app-ref-namespace: <target-namespace>kubestash.com/repo-name: <repository-name>These labels can be used to watch only the
Snapshots related to our desired Workload orRepository.
If we check the YAML of the Snapshot, we can find the information about the backed up components of the Deployment.
$ kubectl get snapshots -n demo minio-demo-repo-sample-backup-dep-demo-session-1706015400 -oyaml
apiVersion: storage.kubestash.com/v1alpha1
kind: Snapshot
metadata:
  labels:
    kubestash.com/app-ref-kind: Deployment
    kubestash.com/app-ref-name: kubestash-demo
    kubestash.com/app-ref-namespace: demo
    kubestash.com/repo-name: minio-demo-repo
  name: minio-demo-repo-sample-backup-dep-demo-session-1706015400
  namespace: demo
spec:
  ...
status:
  components:
    dump:
      driver: Restic
      duration: 7.534461497s
      integrity: true
      path: repository/v1/demo-session/dump
      phase: Succeeded
      resticStats:
      - hostPath: /source/data
        id: f28441a36b2167d64597d66d1046573181cad81aa8ff5b0998b64b31ce16f077
        size: 11 B
        uploaded: 1.049 KiB
      size: 806 B
  ...
For Deployment, KubeStash takes backup from only one pod of the Deployment. So, only one component has been taken backup.
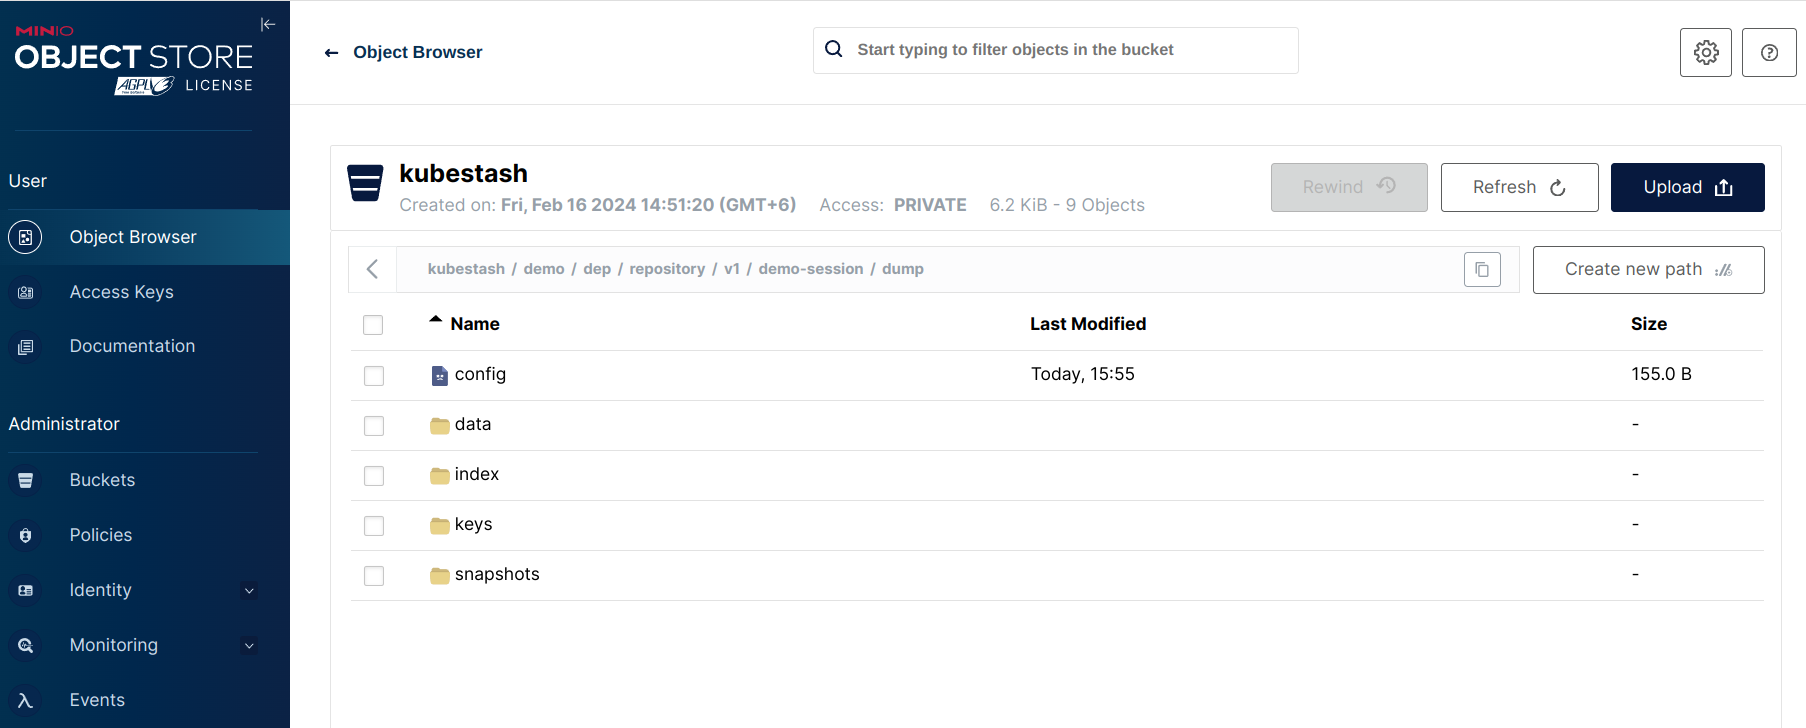
Now, if we navigate to the Minio Bucket, we are going to see backed up data has been stored in <bucket name>/demo/dep/repository/v1/demo-session/dump directory as specified in the repository section within the backupConfiguration crd.
Note: KubeStash stores all dumped data encrypted in the backup directory, meaning it remains unreadable until decrypted.
Restore the Backed up Data
This section will show you how to restore the backed up data from Minio bucket we have taken in earlier section.
Deploy Deployment:
We are going to create a new Deployment named kubestash-recovered with a new PVC and restore the backed up data inside it.
Below are the YAMLs of the Deployment and PVC that we are going to create,
apiVersion: v1
kind: PersistentVolumeClaim
metadata:
  name: restore-pvc
  namespace: demo
spec:
  accessModes:
    - ReadWriteOnce
  storageClassName: standard
  resources:
    requests:
      storage: 1Gi
---
apiVersion: apps/v1
kind: Deployment
metadata:
  labels:
    app: kubestash-recovered
  name: kubestash-recovered
  namespace: demo
spec:
  replicas: 3
  selector:
    matchLabels:
      app: kubestash-recovered
  template:
    metadata:
      labels:
        app: kubestash-recovered
      name: busybox
    spec:
      containers:
        - args:
            - sleep
            - "3600"
          image: busybox
          imagePullPolicy: IfNotPresent
          name: busybox
          volumeMounts:
            - mountPath: /source/data
              name: restore-data
      restartPolicy: Always
      volumes:
        - name: restore-data
          persistentVolumeClaim:
            claimName: restore-pvc
Let’s create the Deployment and PVC we have shown above.
$ kubectl apply -f https://github.com/kubestash/docs/raw/v2024.8.30/docs/guides/platforms/minio/examples/recovered_deployment.yaml
persistentvolumeclaim/restore-pvc created
deployment.apps/kubestash-recovered created
Create RestoreSession:
Now, we need to create a RestoreSession crd targeting the kubestash-recovered Deployment.
Below is the YAML of the RestoreSesion crd that we are going to create,
apiVersion: core.kubestash.com/v1alpha1
kind: RestoreSession
metadata:
  name: sample-restore
  namespace: demo
spec:
  target:
    apiGroup: apps
    kind: Deployment
    name: kubestash-recovered
    namespace: demo
  dataSource:
    repository: minio-demo-repo
    snapshot: latest
    encryptionSecret:
      name: encryption-secret
      namespace: demo
  addon:
    name: workload-addon
    tasks:
      - name: logical-backup-restore
Here,
spec.dataSource.snapshotspecifies to restore from latestSnapshot.
Let’s create the RestoreSession crd we have shown above,
$ kubectl apply -f https://github.com/kubestash/docs/raw/v2024.8.30/docs/guides/platforms/minio/examples/restoresession.yaml
restoresession.core.kubestash.com/deployment-restore created
Once, you have created the RestoreSession object, KubeStash will create restore Job(s). Run the following command to watch the phase of the RestoreSession object,
$ watch kubectl get restoresession -n demo
Every 2.0s: kubectl get restores... AppsCode-PC-03: Wed Jan 10 17:13:18 2024

NAME                 REPOSITORY        FAILURE-POLICY     PHASE       DURATION   AGE
deployment-restore   minio-demo-repo                      Succeeded   3s         53s
The Succeeded phase means that the restore process has been completed successfully.
Note: If you want to restore the backed up data inside the same Deployment whose volumes were backed up, you have to remove the corrupted data from the Deployment. Then, you have to create a RestoreSession targeting the Deployment.
Verify Restored Data:
In this section, we are going to verify that the desired data has been restored successfully. At first, check if the kubestash-recovered pod of the Deployment has gone into Running state by the following command,
$ kubectl get pod -n demo
NAME                                   READY   STATUS    RESTARTS   AGE
kubestash-recovered-6f5c46fdbf-lfthv   1/1     Running   0          2m39s
kubestash-recovered-6f5c46fdbf-s7rrq   1/1     Running   0          2m15s
kubestash-recovered-6f5c46fdbf-vn2z8   1/1     Running   0          2m35s
Verify that the sample data has been restored in /source/data directory of the kubestash-recovered pod of the Deployment using the following command,
$ kubectl exec -n demo kubestash-recovered-6f5c46fdbf-s7rrq -- cat /source/data/data.txt
sample_data
Cleaning Up
To clean up the Kubernetes resources created by this tutorial, run:
kubectl delete -n demo deployment kubestash-demo
kubectl delete -n demo deployment kubestash-recovered
kubectl delete -n demo backupconfiguration deployment-backup
kubectl delete -n demo restoresession deployment-restore
kubectl delete -n demo backupstorage minio-storage
kubectl delete -n demo retentionpolicy demo-retention
kubectl delete -n demo secret encryption-secret
kubectl delete -n demo secret minio-secret
kubectl delete -n demo pvc --all