


You are looking at the documentation of a prior release. To read the documentation of the latest release, please
visit here.
Snapshotting the volumes of a StatefulSet
This guide will show you how to use KubeStash to snapshot the volumes of a StatefulSet and restore them from the snapshots using Kubernetes VolumeSnapshot API. In this guide, we are going to backup the volumes in Google Cloud Platform with the help of GCE Persistent Disk CSI Driver.
Before You Begin
- At first, you need to be familiar with the GCE Persistent Disk CSI Driver.
- If you don’t know how VolumeSnapshot works in KubeStash, please visit here.
- Install
KubeStashin your cluster following the steps here. - You should be familiar with the following
KubeStashconcepts:
Prepare for VolumeSnapshot
Here, we are going to create StorageClass that uses GCE Persistent Disk CSI Driver.
Below is the YAML of the StorageClass we are going to use,
apiVersion: storage.k8s.io/v1
kind: StorageClass
metadata:
  name: csi-standard
parameters:
  type: pd-standard
provisioner: pd.csi.storage.gke.io
reclaimPolicy: Delete
volumeBindingMode: Immediate
Let’s create the StorageClass we have shown above,
$ kubectl apply -f https://github.com/kubestash/docs/raw/v2024.4.27/docs/guides/volumesnapshot/statefulset/examples/storageclass.yaml
storageclass.storage.k8s.io/csi-standard created
We also need a VolumeSnapshotClass. Below is the YAML of the VolumeSnapshotClass we are going to use,
apiVersion: snapshot.storage.k8s.io/v1
kind: VolumeSnapshotClass
metadata:
  name: csi-snapshot-class
driver: pd.csi.storage.gke.io
deletionPolicy: Delete
Here,
driverspecifies the respective CSI driver that is responsible for taking snapshot. As we are using GCE Persistent Disk CSI Driver, we are going to usepd.csi.storage.gke.ioin this field.
Let’s create the volumeSnapshotClass we have shown above,
$ kubectl apply -f https://github.com/kubestash/docs/raw/v2024.4.27/docs/guides/volumesnapshot/statefulset/examples/volumesnapshotclass.yaml
volumesnapshotclass.snapshot.storage.k8s.io/csi-snapshot-class created
To keep everything isolated, we are going to use a separate namespace called demo throughout this tutorial.
$ kubectl create ns demo
namespace/demo created
Note: YAML files used in this tutorial are stored in /docs/guides/volumesnapshot/pvc/examples directory of kubestash/docs repository.
Prepare Workload
When you create a StatefulSet, there is no need to create PVCs separately, because all replicas in StatefulSet use different PVCs to store data. Kubernetes allows us to define a volumeClaimTemplates in StatefulSet so that new PVC is created for each replica automatically. We are going to take snapshot of those PVCs using KubeStash.
Deploy StatefulSet :
Now, we are going to deploy a StatefulSet. This StatefulSet will automatically generate sample data in /source/data directory.
Below is the YAML of the StatefulSet that we are going to create,
apiVersion: v1
kind: Service
metadata:
  name: svc
  labels:
    app: demo
  namespace: demo
spec:
  ports:
  - port: 80
    name: web
  clusterIP: None
  selector:
    app: kubestash
---
apiVersion: apps/v1
kind: StatefulSet
metadata:
  name: kubestash-demo
  namespace: demo
spec:
  selector:
    matchLabels:
      app: kubestash
  serviceName: svc
  replicas: 3
  template:
    metadata:
      labels:
        app: kubestash
    spec:
      containers:
      - args: ["echo $(POD_NAME) > /source/data/data.txt && sleep 3000"]
        command: ["/bin/sh", "-c"]
        env:
        - name:  POD_NAME
          valueFrom:
            fieldRef:
              fieldPath:  metadata.name
        name: nginx
        image: nginx
        ports:
        - containerPort: 80
          name: web
        volumeMounts:
        - name: source-data
          mountPath: /source/data
  volumeClaimTemplates:
  - metadata:
      name: source-data
      namespace: demo
    spec:
      accessModes:
      - ReadWriteOnce
      storageClassName: csi-standard
      resources:
        requests:
          storage: 1Gi
Let’s create the StatefulSet we have shown above.
$ kubectl create -f ./docs/guides/volumesnapshot/statefulset/examples/statefulset.yaml
service/svc created
statefulset.apps/kubestash-demo created
Now, wait for the pod of StatefulSet to go into the Running state.
$ kubectl get pod -n demo
NAME               READY   STATUS    RESTARTS   AGE
kubestash-demo-0   1/1     Running   0          62s
kubestash-demo-1   1/1     Running   0          41s
kubestash-demo-2   1/1     Running   0          19s
Let’s find out the PVCs created for these replicas,
kubectl get pvc -n demo
NAME                           STATUS   VOLUME                                     CAPACITY   ACCESS MODES   STORAGECLASS   AGE
source-data-kubestash-demo-0   Bound    pvc-13d017a6-0df4-4874-9a80-886b63d7807f   1Gi        RWO            csi-standard   83s
source-data-kubestash-demo-1   Bound    pvc-ad0a8f63-f715-40c8-a6af-8e361b9f76bf   1Gi        RWO            csi-standard   62s
source-data-kubestash-demo-2   Bound    pvc-3ce8dfed-cea8-4456-a34d-4c8aa343c6a2   1Gi        RWO            csi-standard   40s
Verify that the sample data has been created in /source/data directory using the following command,
$ kubectl exec -n demo kubestash-demo-0 -- cat /source/data/data.txt
kubestash-demo-0
$ kubectl exec -n demo kubestash-demo-1 -- cat /source/data/data.txt
kubestash-demo-1
$ kubectl exec -n demo kubestash-demo-2 -- cat /source/data/data.txt
kubestash-demo-2
Prepare Backend
Now, we are going to take VolumeSnapshot of the StatefulSet kubestash-demo PVCs using KubeStash. For this, we have to create a Secret with necessary credentials and a BackupStorage object. If you want to use a different backend, please read the respective backend configuration doc from here.
For GCS backend, if the bucket does not exist, KubeStash needs
Storage Object Adminrole permissions to create the bucket. For more details, please check the following guide.
Create Secret:
Let’s create a Secret named gcs-secret with access credentials of our desired GCS backend,
$ echo -n '<your-project-id>' > GOOGLE_PROJECT_ID
$ cat /path/to/downloaded/sa_key_file.json > GOOGLE_SERVICE_ACCOUNT_JSON_KEY
$ kubectl create secret generic -n demo gcs-secret \
    --from-file=./GOOGLE_PROJECT_ID \
    --from-file=./GOOGLE_SERVICE_ACCOUNT_JSON_KEY
secret/gcs-secret created
Create BackupStorage:
Now, create a BackupStorage custom resource specifying the desired bucket, and directory inside the bucket where the backed up data will be stored.
Below is the YAML of BackupStorage object that we are going to create,
apiVersion: storage.kubestash.com/v1alpha1
kind: BackupStorage
metadata:
  name: gcs-storage
  namespace: demo
spec:
  storage:
    provider: gcs
    gcs:
      bucket: kubestash-qa
      prefix: demo
      secretName: gcs-secret
  usagePolicy:
    allowedNamespaces:
      from: All
  default: true
  deletionPolicy: WipeOut
Let’s create the BackupStorage object that we have shown above,
$ kubectl apply -f https://github.com/kubestash/docs/raw/v2024.4.27/docs/guides/volumes/statefulset/examples/backupstorage.yaml
backupstorage.storage.kubestash.com/gcs-storage created
Now, we are ready to backup our target volume into this backend.
Create RetentionPolicy:
Now, we have to create a RetentionPolicy object to specify how the old Snapshots should be cleaned up.
Below is the YAML of the RetentionPolicy object that we are going to create,
apiVersion: storage.kubestash.com/v1alpha1
kind: RetentionPolicy
metadata:
  name: demo-retention
  namespace: demo
spec:
  default: true
  failedSnapshots:
    last: 2
  maxRetentionPeriod: 2mo
  successfulSnapshots:
    last: 5
  usagePolicy:
    allowedNamespaces:
      from: Same
Notice the spec.usagePolicy that allows referencing the RetentionPolicy from all namespaces.For more details on configuring it for specific namespaces, please refer to the following RetentionPolicy usage policy.
Let’s create the RetentionPolicy object that we have shown above,
$ kubectl apply -f https://github.com/kubestash/docs/raw/v2024.4.27/docs/guides/volumes/statefulset/examples/retentionpolicy.yaml
retentionpolicy.storage.kubestash.com/demo-retention created
Backup
Now, we have to create a BackupConfiguration custom resource targeting the StatefulSet that we have created earlier.
Create BackupConfiguration :
Below is the YAML of the BackupConfiguration object that we are going to create,
apiVersion: core.kubestash.com/v1alpha1
kind: BackupConfiguration
metadata:
  name: statefulset-volume-snapshot
  namespace: demo
spec:
  target:
    apiGroup: apps
    kind: StatefulSet
    name:  kubestash-demo
    namespace: demo
  backends:
    - name: gcs-backend
      storageRef:
        namespace: demo
        name: gcs-storage
      retentionPolicy:
        name: demo-retention
        namespace: demo
  sessions:
    - name: frequent-backup
      sessionHistoryLimit: 3
      scheduler:
        schedule: "*/5 * * * *"
        jobTemplate:
          backoffLimit: 1
      repositories:
        - name: gcs-repository
          backend: gcs-backend
          directory: /sts-volume-snapshot-repo
          deletionPolicy: WipeOut
      addon:
        name: workload-addon
        tasks:
          - name: volume-snapshot
            params:
              volumeSnapshotClassName: csi-snapshot-class
Here,
spec.sessions[*].addon.tasks[*].params.volumeSnapshotClassNameindicates the VolumeSnapshotClass to be used for volume snapshotting. it should match with theVolumeSnapshotClasswe created earlier. If we don’t provide any then KubeStash use defaultvolumeSnapshotClassfor volume snapshotting.
Let’s create the BackupConfiguration object we have shown above.
$ kubectl apply -f https://github.com/kubestash/docs/raw/v2024.4.27/docs/guides/volumesnapshot/statefulset/examples/backupconfiguration.yaml
backupconfiguration.core.kubestash.com/statefulset-volume-snapshot created
Verify Backup Setup Successful
If everything goes well, the phase of the BackupConfiguration should be in Ready state. The Ready phase indicates that the backup setup is successful.
Let’s check the Phase of the BackupConfiguration,
$ kubectl get backupconfiguration -n demo
NAME                          PHASE   PAUSED   AGE
statefulset-volume-snapshot   Ready            12s
Verify Repository:
Verify that KubeStash has created Repositories that holds the BackupStorage information by the following command,
$ kubectl get repositories -n demo
NAME             INTEGRITY   SNAPSHOT-COUNT   SIZE   PHASE   LAST-SUCCESSFUL-BACKUP   AGE
gcs-repository                                       Ready                            28s
Verify Repository:
Verify that the Repository specified in the BackupConfiguration has been created using the following command,
$ kubectl get repositories -n demo
NAME             INTEGRITY   SNAPSHOT-COUNT   SIZE   PHASE   LAST-SUCCESSFUL-BACKUP   AGE
gcs-repository                                       Ready                            28s
KubeStash keeps the backup for Repository YAMLs. If we navigate to the GCS bucket, we will see the Repository YAML stored in the demo/sts-volume-snapshot-repo directory.
Verify CronJob:
Verify that KubeStash has created a CronJob with the schedule specified in spec.sessions[*].scheduler.schedule field of BackupConfiguration object.
Check that the CronJob has been created using the following command,
$ kubectl get cronjob -n demo
NAME                                                  SCHEDULE      SUSPEND   ACTIVE   LAST SCHEDULE   AGE
trigger-statefulset-volume-snapshot-frequent-backup   */5 * * * *   False     0        <none>          99s
Wait for BackupSession:
Now, wait for the next backup schedule. You can watch for BackupSession CR using the following command,
$ watch -n 1 kubectl get backupsession -n demo -l=kubestash.com/invoker-name=statefulset-volume-snapshot
Every 1.0s: kubectl get backupsession -n demo -l=kubestash.com/invoker-name=statefulset-volume-sn...  anisur: Tue Jan 16 17:40:07 2024

NAME                                                     INVOKER-TYPE          INVOKER-NAME                  PHASE     DURATION   AGE
statefulset-volume-snapshot-frequent-backup-1705405201   BackupConfiguration   statefulset-volume-snapshot   Running              7s
Here, the phase Succeeded means that the backup process has been completed successfully.
Verify Backup:
When backup session is complete, KubeStash will update the respective Repository object to reflect the backup. Check that the repository gcs-repository has been updated by the following command,
$ kubectl get repositories -n demo
NAME             INTEGRITY   SNAPSHOT-COUNT   SIZE        PHASE   LAST-SUCCESSFUL-BACKUP   AGE
gcs-repository   true        1                2.262 KiB   Ready   103s                     72s
At this moment we have one Snapshot. Run the following command to check the respective Snapshot.
Verify created Snapshot object by the following command,
$ watch -n 1 kubectl get snapshot -n demo -l=kubestash.com/repo-name=gcs-repository

Every 2.0s: kubectl get snapshots.storage.kubestash.com -n demo -l=kubestash.com/repo-name=gcs-repository                                               anisur: Tue Jan 16 17:03:06 2024

NAME                                                              REPOSITORY       SESSION           SNAPSHOT-TIME          DELETION-POLICY   PHASE       VERIFICATION-STATUS   AGE
gcs-repository-statefulset-volumshot-frequent-backup-1705405201   gcs-repository   frequent-backup   2024-01-16T11:00:08Z   Delete            Succeeded                         3m6s
Note: KubeStash creates a
Snapshotwith the following labels:
kubestash.com/app-ref-kind: <target-kind>kubestash.com/app-ref-name: <target-name>kubestash.com/app-ref-namespace: <target-namespace>kubestash.com/repo-name: <repository-name>These labels can be used to watch only the
Snapshots related to our desired Workload orRepository.
Now, lets retrieve the YAML for the Snapshot, and inspect the spec.status section to see the backup information of the targeted PVC.
$ kubectl get snapshots -n demo gcs-repository-statefulset-volumshot-frequent-backup-1705405201 -o yaml
apiVersion: storage.kubestash.com/v1alpha1
kind: Snapshot
metadata:
  creationTimestamp: "2024-01-16T11:40:01Z"
  name: gcs-repository-statefulset-volumshot-frequent-backup-1705405201
  namespace: demo
spec:
  ---
status:
  components:
    volumesnapshot-pod-0:
      driver: VolumeSnapshotter
      phase: Succeeded
      volumeSnapshotterStats:
        - hostPath: /source/data
          pvcName: source-data-kubestash-demo-0
          volumeSnapshotName: source-data-kubestash-demo-0-1705405201
      volumesnapshot-pod-1:
        driver: VolumeSnapshotter
        phase: Succeeded
        volumeSnapshotterStats:
          - hostPath: /source/data
            pvcName: source-data-kubestash-demo-1
            volumeSnapshotName: source-data-kubestash-demo-1-1705405201
      volumesnapshot-pod-2:
        driver: VolumeSnapshotter
        phase: Succeeded
        volumeSnapshotterStats:
          - hostPath: /source/data
            pvcName: source-data-kubestash-demo-2
            volumeSnapshotName: source-data-kubestash-demo-2-1705405201
  conditions:
    ---
  phase: Succeeded
  snapshotTime: "2024-01-16T11:40:45Z"
  totalComponents: 3
Here,
For volume snapshot backup KubeStash uses
volumesnapshot-pod-<pod-ordinal>as the component name for the StatefulSetPVCs.
volumeSnapshotterStats.pvcNamespecifies the name of the targetedPVC.volumeSnapshotterStats.hostPathspecifies the mount path for the targetedPVCwithin the workload.volumeSnapshotterStats.volumeSnapshotNamespecifies the name of theVolumeSnapshotcreated for the targeted PVC.
KubeStash keeps the backup for Snapshot YAMLs. If we navigate to the GCS bucket, we will see the Snapshot YAML stored in the <kubestash-qa/demo/sts-volume-snapshot-repo/snapshots> directory.
Verify VolumeSnapshot:
Once a BackupSession CR is created, KubeStash operator creates a volume snapshotter Job. Then the Job creates a VolumeSnapshot CR for the targeted PVC.
Run the following command to check that the VolumeSnapshot has been created Successfully.
$ kubectl get volumesnapshot -n demo
NAME                                      READYTOUSE   SOURCEPVC                      SOURCESNAPSHOTCONTENT   RESTORESIZE   SNAPSHOTCLASS        SNAPSHOTCONTENT                                    CREATIONTIME   AGE
source-data-kubestash-demo-0-1705405201   true         source-data-kubestash-demo-0                           1Gi           csi-snapshot-class   snapcontent-f4a199c2-eed5-4438-aa09-e9c9683556ef   17m            17m
source-data-kubestash-demo-1-1705405201   true         source-data-kubestash-demo-1                           1Gi           csi-snapshot-class   snapcontent-b7b7ffa1-809d-4c35-aa79-445f8fd39313   17m            17m
source-data-kubestash-demo-2-1705405201   true         source-data-kubestash-demo-2                           1Gi           csi-snapshot-class   snapcontent-bc84b998-0077-4458-bbf2-b85d06628296   17m            17m
Let’s find out the actual VolumeSnapshotContent that has been saved in the Google Cloud by the following command,
kubectl get volumesnapshot -n demo source-data-kubestash-demo-0-1705405201 -o yaml
apiVersion: snapshot.storage.k8s.io/v1
kind: VolumeSnapshot
metadata:
  creationTimestamp: "2024-01-16T11:40:04Z"
  finalizers:
    - snapshot.storage.kubernetes.io/volumesnapshot-as-source-protection
    - snapshot.storage.kubernetes.io/volumesnapshot-bound-protection
  generation: 1
  name: source-data-kubestash-demo-0-1705405201
  namespace: demo
  resourceVersion: "30453"
  uid: f4a199c2-eed5-4438-aa09-e9c9683556ef
spec:
  source:
    persistentVolumeClaimName: source-data-kubestash-demo-0
  volumeSnapshotClassName: csi-snapshot-class
status:
  boundVolumeSnapshotContentName: snapcontent-f4a199c2-eed5-4438-aa09-e9c9683556ef
  creationTime: "2024-01-16T11:40:06Z"
  readyToUse: true
  restoreSize: 1Gi
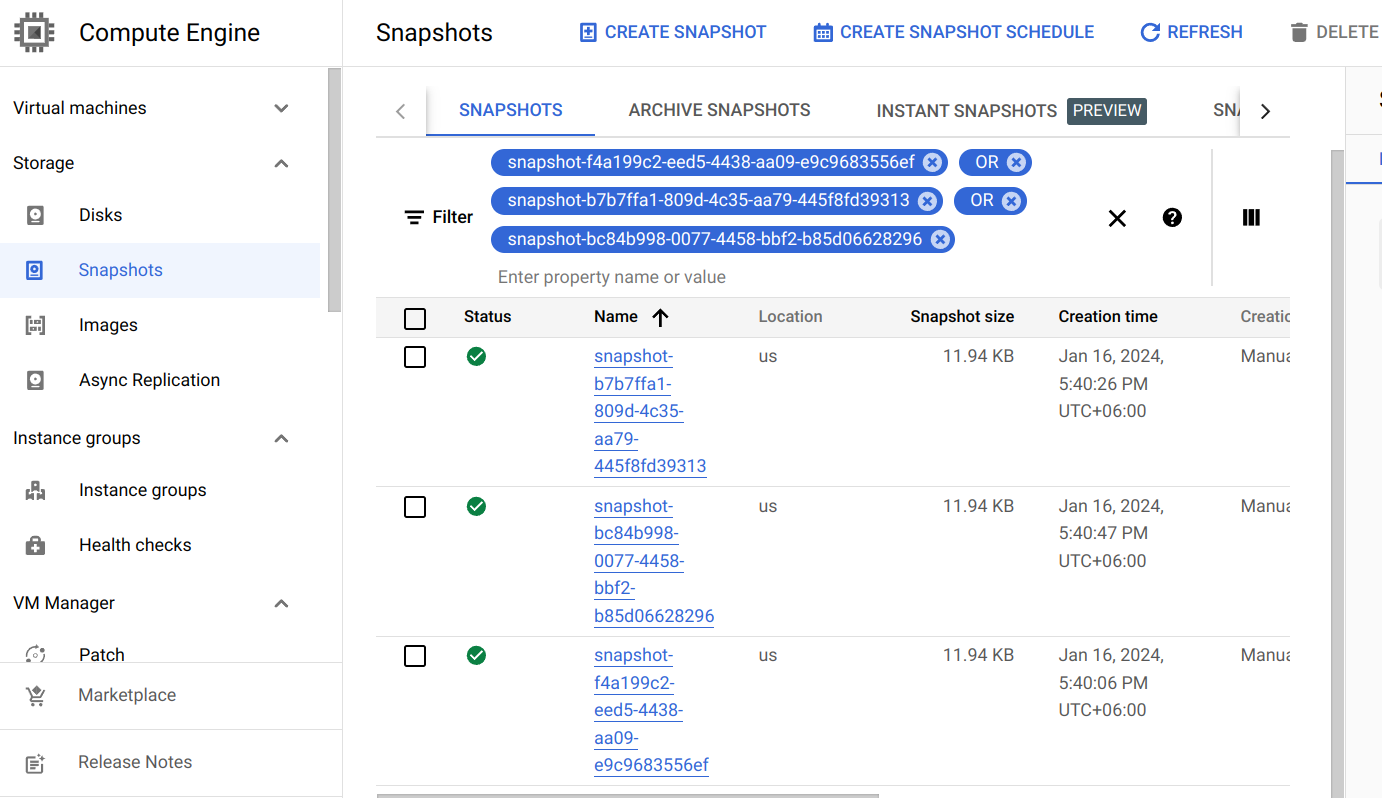
Here, status.boundVolumeSnapshotContentName field specifies the name of the VolumeSnapshotContent object. It also represents the actual snapshot name that has been saved in Google Cloud. If we navigate to the Snapshots tab in the GCP console, we are going to see snapshot snapcontent-f4a199c2-eed5-4438-aa09-e9c9683556ef has been stored successfully.
Restore
This section will show you how to restore the PVCs from the snapshots we have taken in the previous section.
Create RestoreSession :
Now, we are going to create a RestoreSession custom resource to restore all backed-up PVC volumes individually from their respective VolumeSnapshot. Below is the YAML of the RestoreSession object that we are going to create,
apiVersion: core.kubestash.com/v1alpha1
kind: RestoreSession
metadata:
  name: restore-statefulset-pvc
  namespace: demo
spec:
  dataSource:
    repository: gcs-repository
    snapshot: latest
  addon:
    name: pvc-addon
    tasks:
      - name: VolumeSnapshotRestore
        targetVolumes:
          volumeClaimTemplates:
            - metadata:
                name: restore-data-restore-demo-${POD_ORDINAL}
              spec:
                accessModes: [ "ReadWriteOnce" ]
                storageClassName: "csi-standard"
                resources:
                  requests:
                    storage: 1Gi
Here,
spec.dataSource.repositoryspecifies name of theRepositoryfrom which the data will be restored.spec.dataSource.snapshotspecifies the name of theSnapshotthat will be restored.spec.addon.targetVolumes.volumeClaimTemplates[*]:metadata.nameis a template for the name of the restored PVC that will be created by KubeStash. You have to provide this named template to match with the desired PVC of a StatefulSet. For example, if you want to deploy a StatefulSet namedkubestash-demowithvolumeClaimTemplatenamemy-volume, the PVCs of your StatefulSet will bemy-volume-kubestash-demo-0,my-volume-kubestash-demo-1and so on. In this case, you have to providevolumeClaimTemplatename inRestoreSessionin the following format:<volume claim name>-<statefulset name>-${POD_ORDINAL}- The
${POD_ORDINAL}variable is resolved by KubeStash. - So for the above example,
volumeClaimTemplatename forRestoreSessionwill berestore-data-restore-demo-${POD_ORDINAL}.
Let’s create the RestoreSession object we have shown above.
$ kubectl apply -f https://github.com/kubestash/docs/raw/v2024.4.27/docs/guides/volumesnapshot/statefulset/examples/restoresession.yaml
Once, you have created the RestoreSession object, KubeStash will create a job to restore. We can watch the RestoreSession phase to check if the restore process has succeeded or not.
Run the following command to watch RestoreSession phase,
$ watch -n 1 kubectl get restore -n demo
Every 1.0s: kubectl get restore -n demo                                                anisur: Tue Jan 16 18:08:51 2024

NAME                      REPOSITORY       FAILURE-POLICY   PHASE     DURATION   AGE
restore-statefulset-pvc   gcs-repository                    Running              50s
restore-statefulset-pvc   gcs-repository                    Succeeded            50s
So, we can see from the output of the above command that the restore process succeeded.
Verify Restored PVC :
Once the restore process is complete, we are going to see that new PVCs with the name restore-data-restore-demo-0 , restore-data-restore-demo-1 and restore-data-restore-demo-2 has been created.
Verify that the PVCs has been created by the following command,
$ kubectl get pvc -n demo
NAME                           STATUS   VOLUME                                     CAPACITY   ACCESS MODES   STORAGECLASS   AGE
restore-data-restore-demo-0    Bound    pvc-5ab92607-0c02-4763-b0ff-d1526d5aa845   1Gi        RWO            csi-standard   89s
restore-data-restore-demo-1    Bound    pvc-93b0305f-500d-4d29-a8e4-661325bccabd   1Gi        RWO            csi-standard   66s
restore-data-restore-demo-2    Bound    pvc-8632d3a2-e6a7-4104-86e6-1a90957be476   1Gi        RWO            csi-standard   44s
Notice the STATUS field. It indicates that the respective PV has been provisioned and initialized from the respective VolumeSnapshot by CSI driver and the PVC has been bound with the PV.
The volumeBindingMode field controls when volume binding and dynamic provisioning should occur. Kubernetes allows
ImmediateandWaitForFirstConsumermodes for binding volumes. TheImmediatemode indicates that volume binding and dynamic provisioning occurs once the PVC is created andWaitForFirstConsumermode indicates that volume binding and provisioning does not occur until a pod is created that uses this PVC. By defaultvolumeBindingModeisImmediate.
Verify Restored Data :
We are going to create a new Statefulset with the restored PVCs to verify whether the backed up data has been restored.
Below, the YAML for the Statefulset we are going to create.
apiVersion: v1
kind: Service
metadata:
  name: restore-svc
  labels:
    app: restore-demo
  namespace: demo
spec:
  ports:
  - port: 80
    name: web
  clusterIP: None
  selector:
    app: restore-demo
---
apiVersion: apps/v1
kind: StatefulSet
metadata:
  name: restore-demo
  namespace: demo
spec:
  selector:
    matchLabels:
      app: restore-demo
  serviceName: svc
  replicas: 3
  template:
    metadata:
      labels:
        app: restore-demo
    spec:
      containers:
      - args:
        - sleep
        - "3600"
        name: nginx
        image: nginx
        ports:
        - containerPort: 80
          name: web
        volumeMounts:
        - name: restore-data
          mountPath: /restore/data
  volumeClaimTemplates:
    - metadata:
        name: restore-data
        namespace: demo
      spec:
        accessModes:
        - ReadWriteOnce
        storageClassName: csi-standard
        resources:
          requests:
            storage: 1Gi
Let’s create the StatefulSet we have shown above.
$ kubectl apply -f https://github.com/kubestash/docs/raw/v2024.4.27/docs/guides/volumesnapshot/statefulset/examples/restored-statefulset.yaml
service/restore-svc created
statefulset.apps/restore-demo created
Now, wait for the pod of the Statefulset to go into the Running state.
$ kubectl get pod -n demo
NAME             READY   STATUS    RESTARTS   AGE
restore-demo-0   1/1     Running   0          65s
restore-demo-1   1/1     Running   0          46s
restore-demo-2   1/1     Running   0          26s
Verify that the backed up data has been restored in /restore/data directory using the following command,
$ kubectl exec -n demo restore-demo-0 -- cat /restore/data/data.txt
kubestash-demo-0
$ kubectl exec -n demo restore-demo-1 -- cat /restore/data/data.txt
kubestash-demo-1
$ kubectl exec -n demo restore-demo-2 -- cat /restore/data/data.txt
kubestash-demo-2
Cleaning Up
To clean up the Kubernetes resources created by this tutorial, run:
kubectl delete -n demo statefulset kubestash-demo
kubectl delete -n demo statefulset restore-demo
kubectl delete -n demo backupconfiguration statefulset-volume-snapshot
kubectl delete -n demo retentionpolicy demo-retention
kubectl delete -n demo gcs-storage
kubectl delete -n demo restoresession restore-pvc
kubectl delete -n demo pvc --all
kubectl delete -n demo volumesnapshots --all
kubectl delete -n demo storageclass csi-standard
kubectl delete -n demo volumesnapshotclass csi-snapshot-class